One of the great things to come out of the Observability Guild at TrueLayer was a set of metric specifications for HTTP applications. Our next step is to build libraries for each of our supported ecosystems (.NET and Rust) that teams can implement, enabling them to spend less time on cross-cutting concerns and more time on building great products.
It got me thinking about what makes a good library and how we can leverage a number of OSS tools to provide a much richer developer experience.
I decided to create a simple library, Guard, that would serve as a playground for testing a number of tools and practices. There are still a few things left to implement so feel free to follow the project or share your ideas on how you make your libraries stand out.
What is Guard?
Guard is Yet Another Assertions Library (I wasn’t feeling particularly creative). The goal was to create something incredibly simple that did not get in the way of the main focus of the project; to demonstrate the structure, tools and process of creating and maintaining an OSS library.
It’s unlikely that you need this library though it doesn’t seem to have discouraged a number of people downloading it from Nuget :)
Code Structure
Familiarity can go a long way towards increasing adoption. Using the standard conventions of your language/framework/team can be helpful for developers navigating your project.
Since this is a .NET project I’m following the standard .NET folder structure with source code nested under the src directory and tests under test.
A common convention in .NET is to prefix libraries with the organisation or product name, for example Microsoft.AspNet.Identity.EntityFramework. This can create a lot of noise on disk so I prefer to follow more recent conventions, using shorter project names and project properties to specify the extended namespace and package names:
<PropertyGroup>
  <TargetFrameworks>netstandard2.1;net5.0</TargetFrameworks>
  <RootNamespace>O9d.Guard</RootNamespace>
  <AssemblyName>O9d.Guard</AssemblyName>
  <PackageId>O9d.Guard</PackageId>
  <Description>Guard is an opinionated argument assertion library for .NET</Description>
  <PackageIcon>icon.png</PackageIcon>
</PropertyGroup>
For common values we can make use of Directory.Build.Props which saves duplicating this information in every csproj file:
<Project>
  <PropertyGroup>
    <LangVersion>latest</LangVersion>
    <!-- Enable nullable and treat their warnings as errors -->
    <Nullable>enable</Nullable>
    <WarningsAsErrors>nullable;</WarningsAsErrors>
    <EnforceCodeStyleInBuild>true</EnforceCodeStyleInBuild>
  </PropertyGroup>
  <PropertyGroup>
    <Authors>@benfoster</Authors>
    <Company>o9d</Company>
    <PackageProjectUrl>https://github.com/benfoster/o9d-guard</PackageProjectUrl>
    <RepositoryUrl>https://github.com/benfoster/o9d-guard.git</RepositoryUrl>
    <RepositoryType>git</RepositoryType>
  </PropertyGroup>
  <PropertyGroup Label="MinVer">
    <MinVerVerbosity>normal</MinVerVerbosity>
  </PropertyGroup>
</Project>
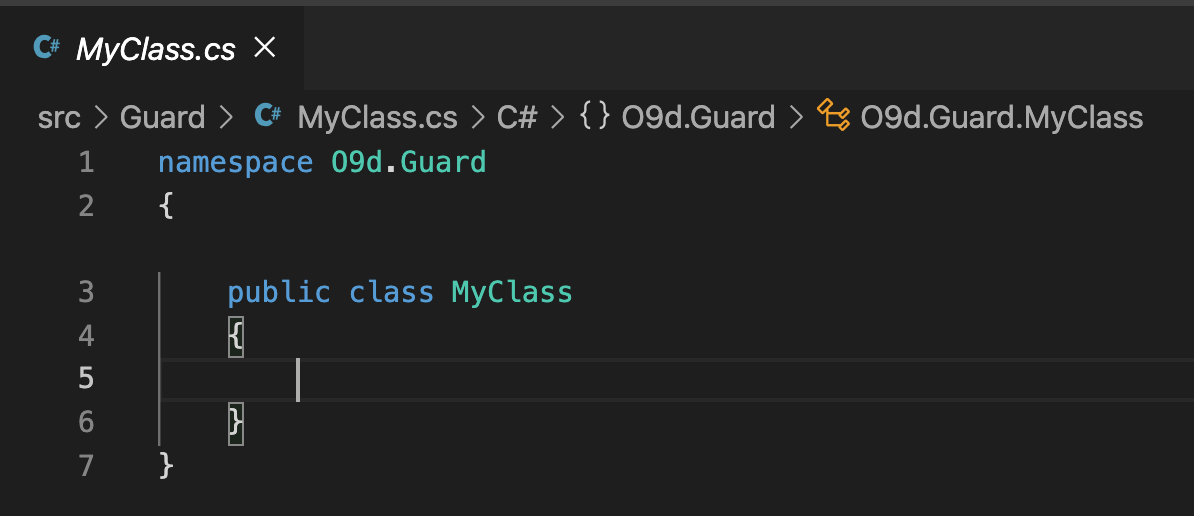
This C# Extensions plugin for VS Code honours the RootNamespace property when creating new types.
I’m targeting both .NET Standard and .NET 5.0 to make the most of the available frameworks, as per these recommendations.
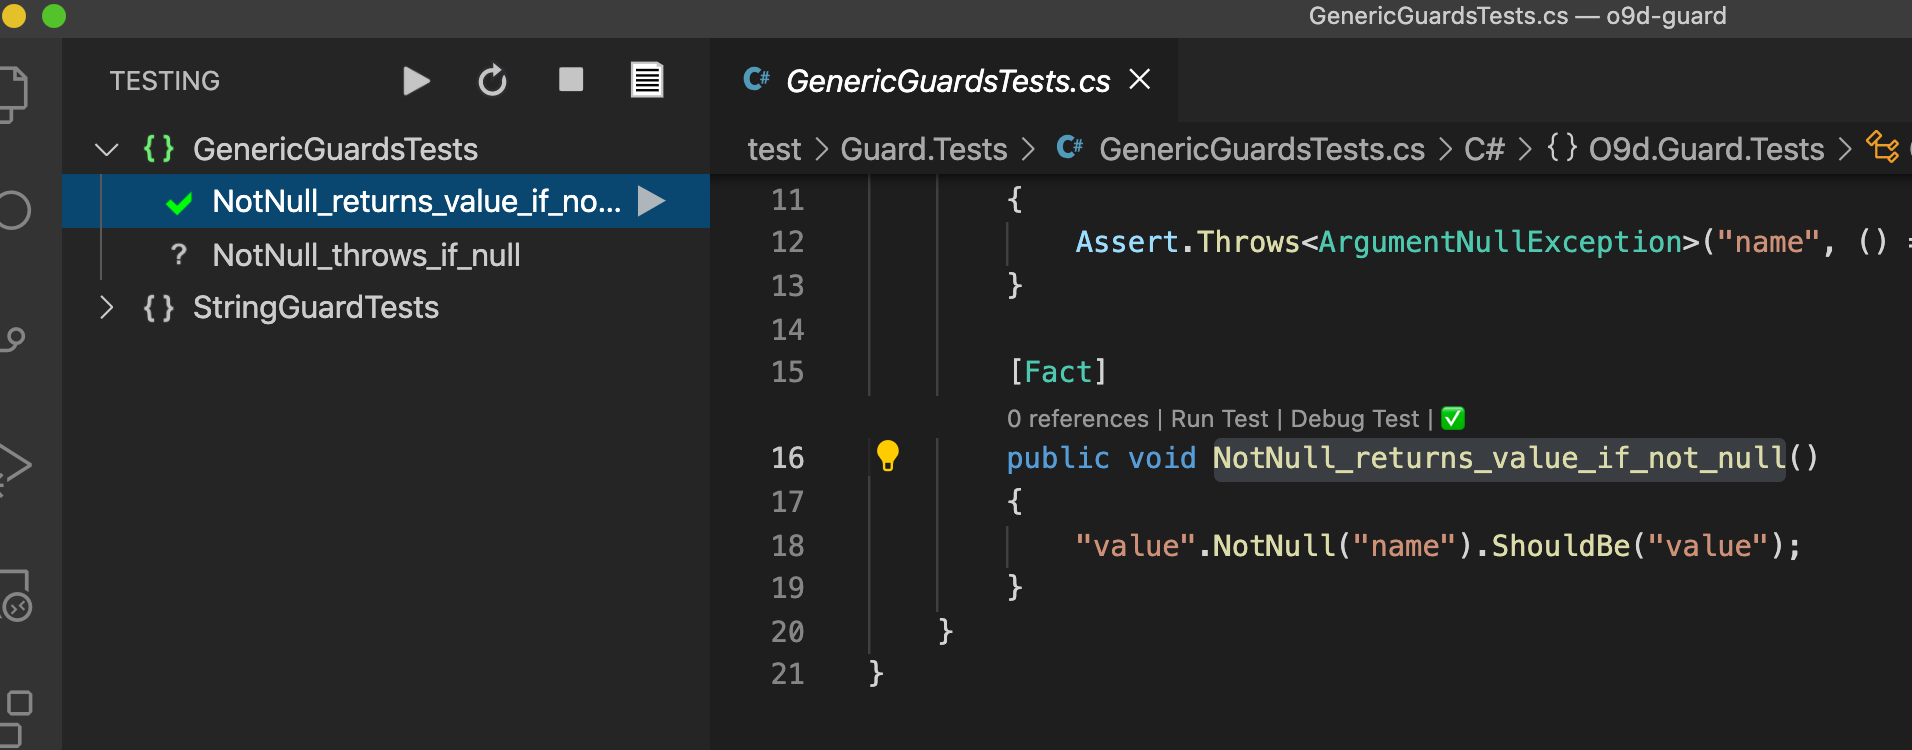
Testing
The project uses XUnit for testing which seems to be the de-facto choice in .NET today. Coupled with the .NET Core Test Explorer Extension this creates quite a nice experience in VS Code.
Test Coverage
Code coverage is recorded using Coverlet. Unfortunately the Coverlet Collector package that is included in the XUnit dotnet template does not support all the options needed to customise format and output location. As such I’m using the MSBuild package.
Each test project generates an OpenCover coverage file which is then merged using Report Generator into a single lcov file. This means we can use the Coverage Gutters Extension to get code coverage visualisations within VS Code:
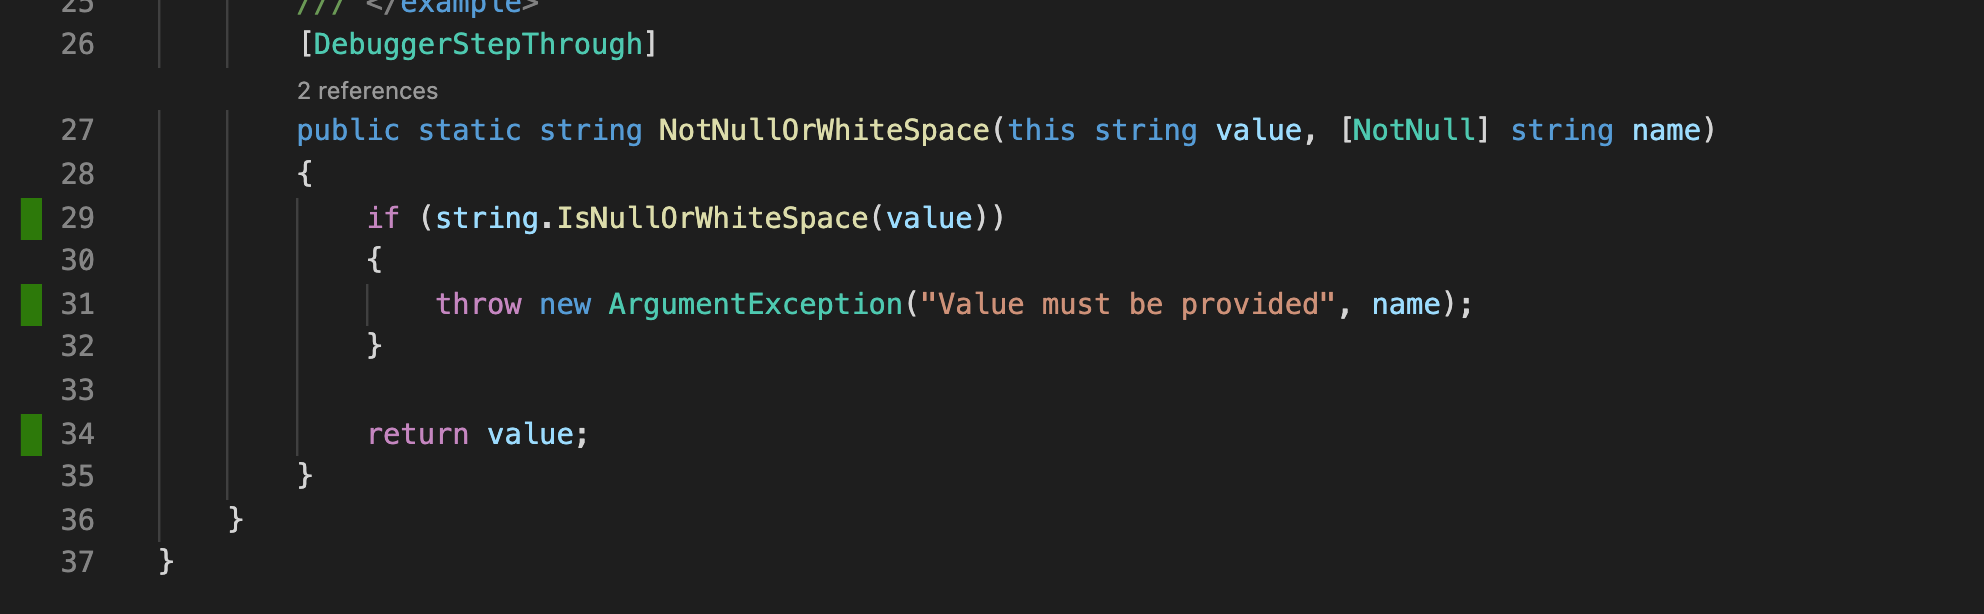
Note that this extension appears to require the coverage file to be named lcov.info for it to be loaded automatically.
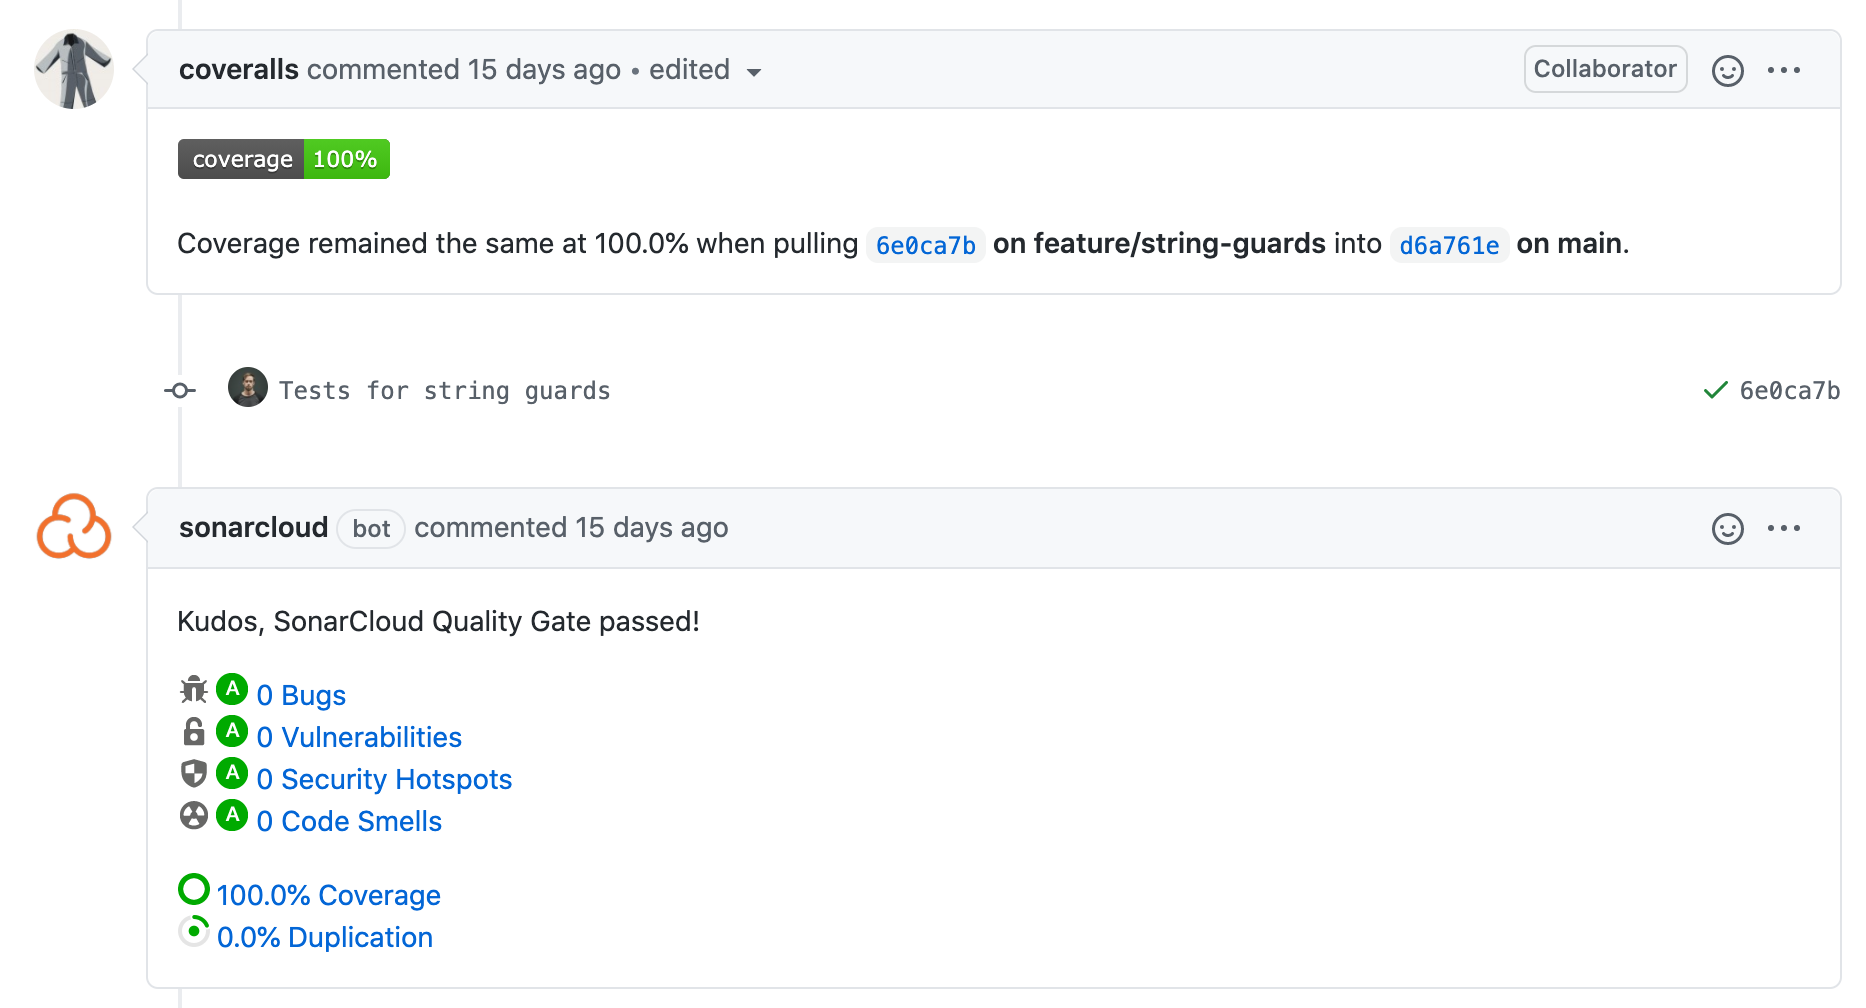
Code coverage is uploaded to both Coveralls and Sonar Cloud which are both free for Open Source projects. Each tool has a slightly different way of measuring code coverage:
- Coveralls measures the difference in total code coverage as the result of a change
- Sonar measures the code coverage within a change (a total coverage gate can only be added to long life branches)
Coverage checks are performed on every PR. Personally I prefer the Coveralls approach as it provides a clearer indication of how a change impacts the overall coverage of the project:
Versioning
Versioning is an important part of any library and my preference for a number of years has been to use GitVersion to semantically version projects based on Git commits. This avoids human error and is tightly integrated with most typical git workflows.
GitVersion is like the swiss army knife of versioning tools and I’ve found that the more I’ve adopted a GitHub-flow way of working with PRs merged directly into master/main, the less I’ve needed its advanced features. Ultimately I just want a way of auto-generating pre-release versions and defining RTM releases.
MinVer fits these requirements perfectly. It installs as a NuGet package into the projects you wish to version and includes support for mono-repos using tag prefixes.
The MinVer GitHub Page defines how versions are calculated, but in short if a commit is tagged, the tag is used as the version, otherwise the height since the last tag is added as a pre-release version:
MinVer: Using { Commit: 7a08ea5, Tag: '0.0.3', Version: 0.0.3, Height: 12 }.
MinVer: Calculated version 0.0.4-alpha.0.12.
To release a new stable version you just need to tag the commit, for example:
git tag -a "0.0.4" -m "Version 0.0.4"
Git/GitHub Setup
I use GitHub Flow whenever possible as it promotes regular deployments and avoids releases becoming too big (which is common with Git Flow).
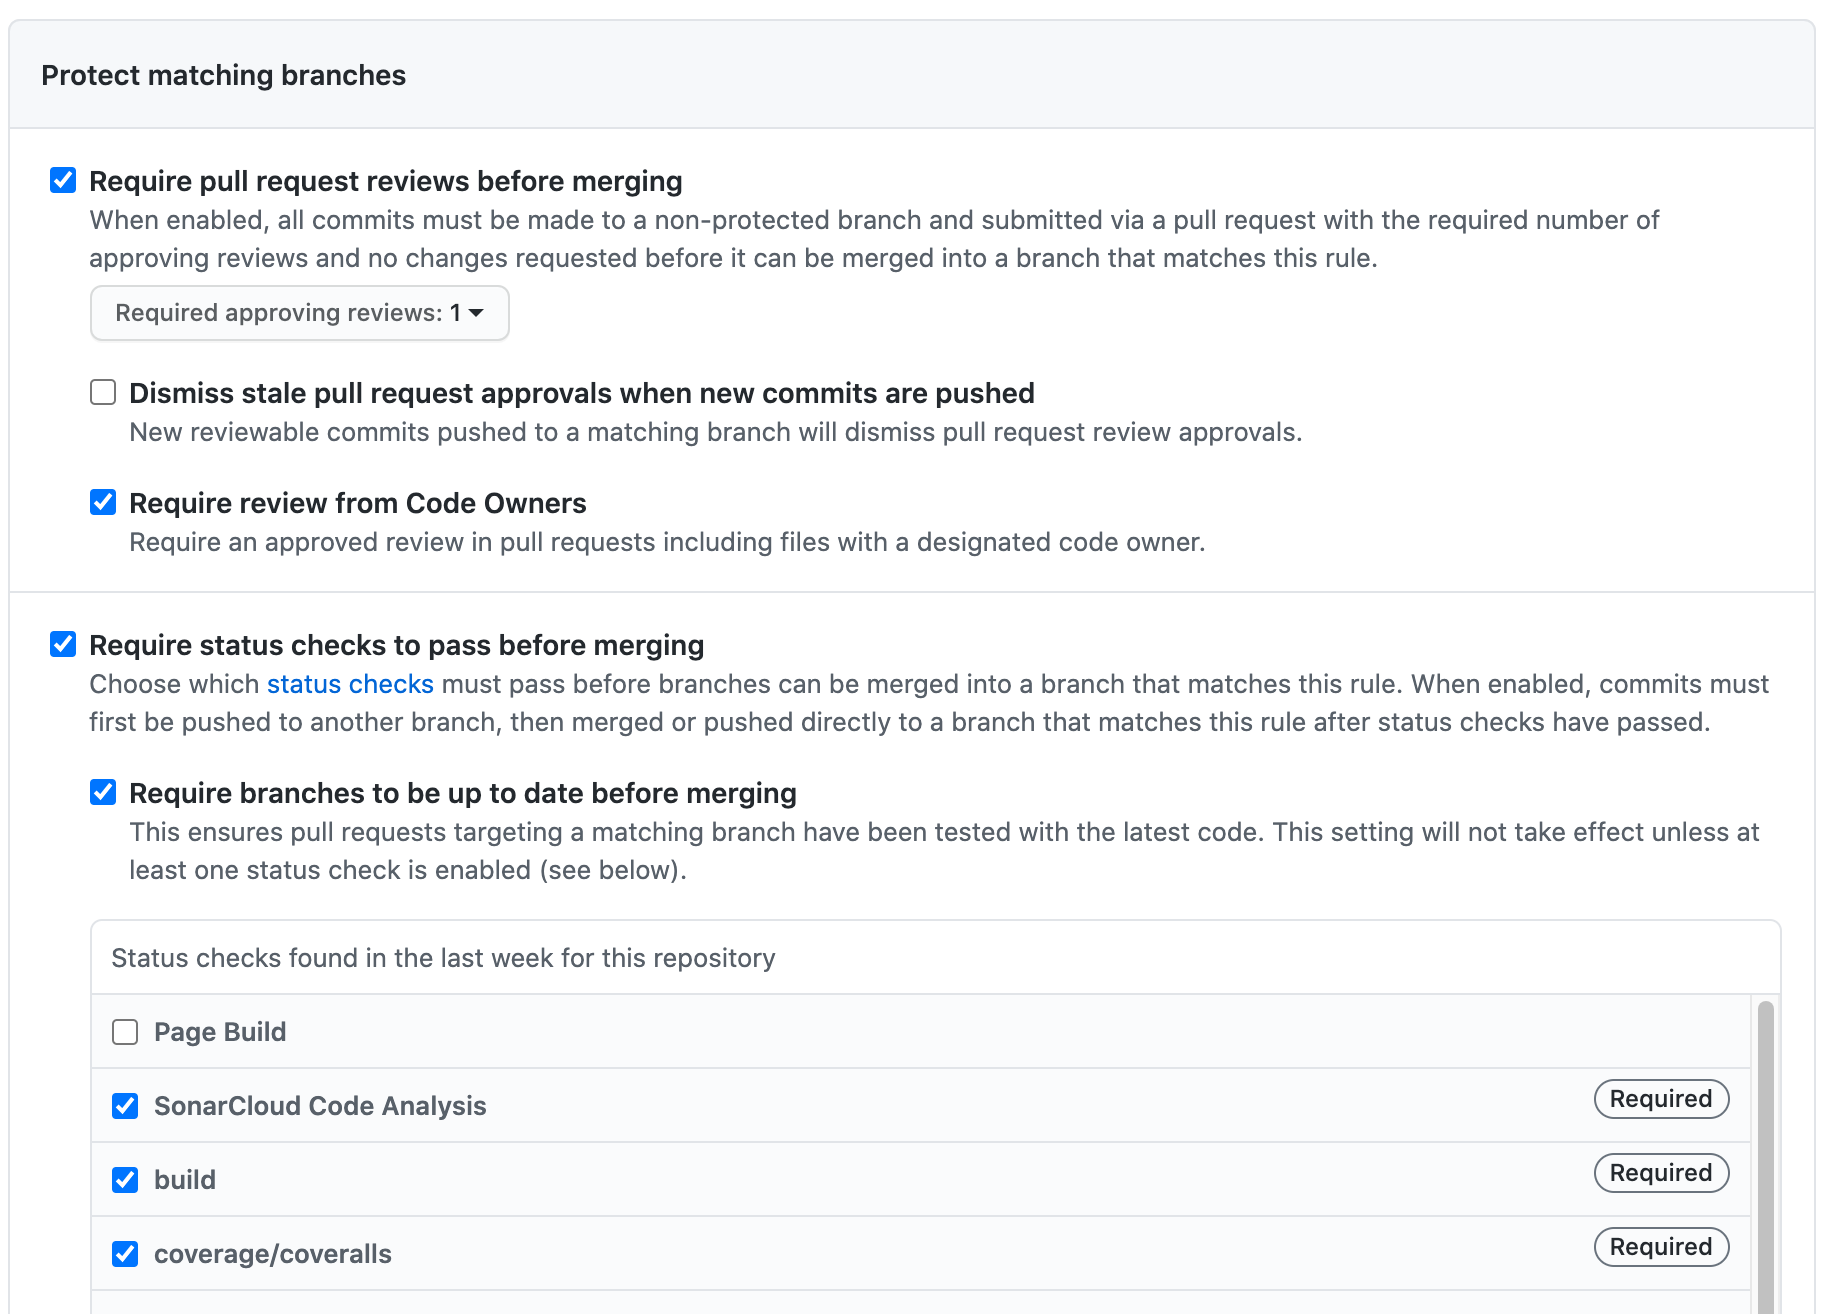
All changes must happen via Pull Requests that are merged directly into main. GitHub branch protection enforces this and ensures that code coverage and security checks succeed before the PR can be merged:
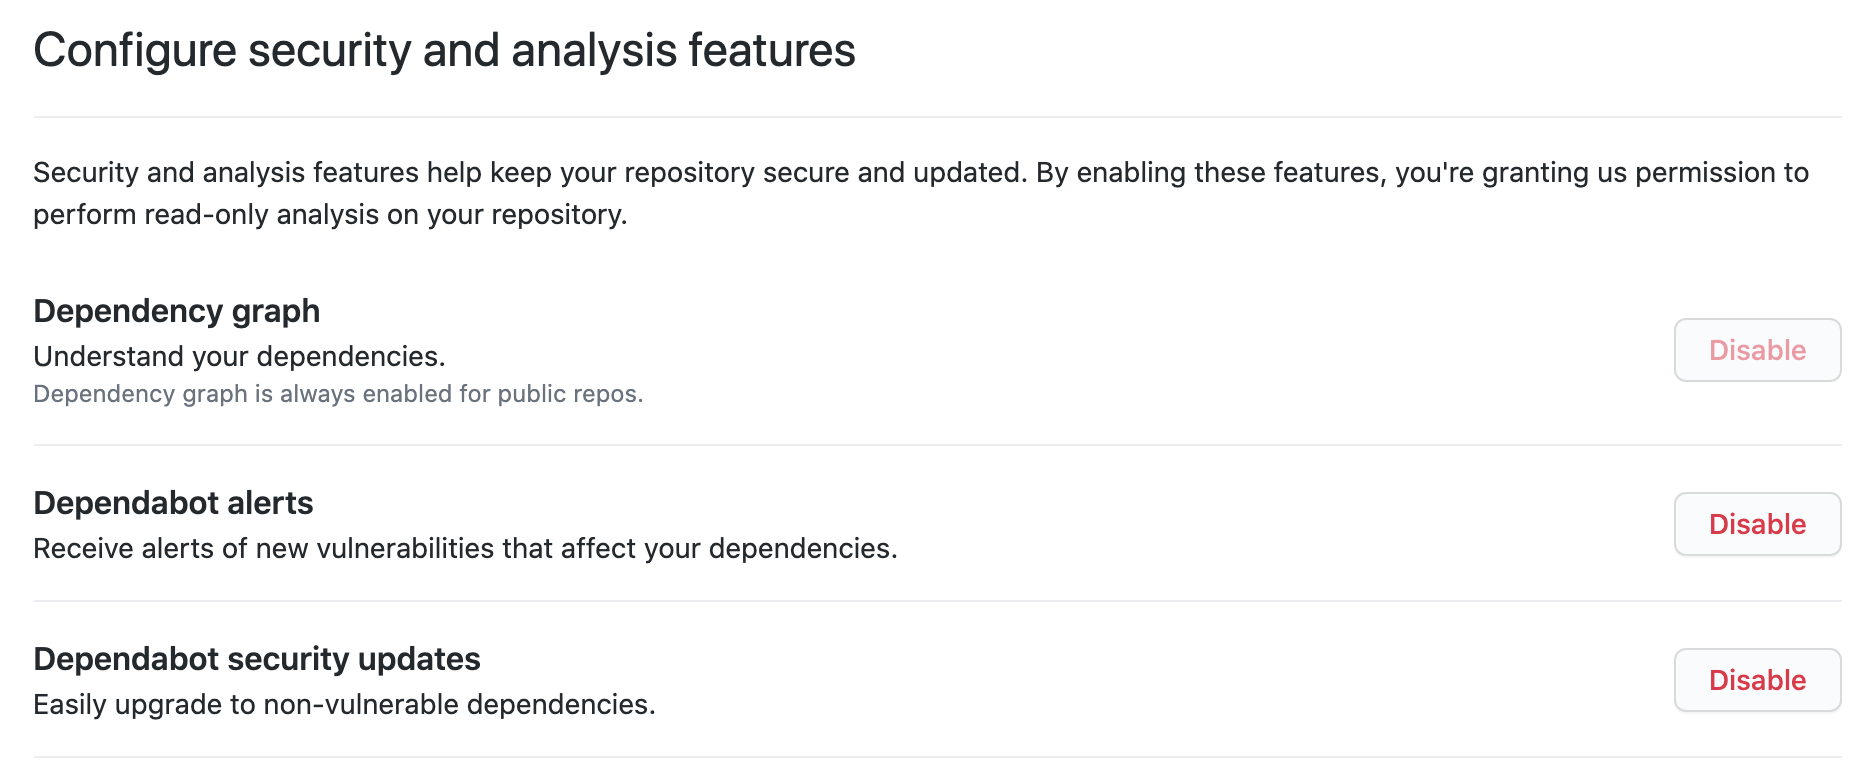
Code analysis should be enabled, especially if you depend on other libraries. This includesDependabot which tracks vulnerabilities in dependencies, even raising PRs to upgrade to non-vulnerable versions.
Security
In addition to Dependabot, I’m using the following security and code analysis tools, which are all free for OSS projects:
- Security Code Scan - A static code analyzer for .NET that detects various security vulnerability patterns. It can be run as a
dotnet toolor added to your project as a NuGet package. - Sonar Cloud - Aside from tracking code coverage, Sonar’s main advantage is code analysis and vulnerability detection. The cloud version includes OWASP, CVE and SANS detection out-of-the-box.
- GuardRails is another code analysis and vulnerability detection tool. The advantage over Sonar Cloud (at least for .NET Core) is that it didn’t require any changes to my build script and scans your repository automatically though it didn’t seem particularly effective in detecting vulnerabilities (see below).
- Snyk - Another open source and code security tool that’s free for Open Source projects. It’s still a bit unclear to me what this offers beyond what we get for free through Dependabot though the Snyk website does suggest vulnerability detection is built-in.
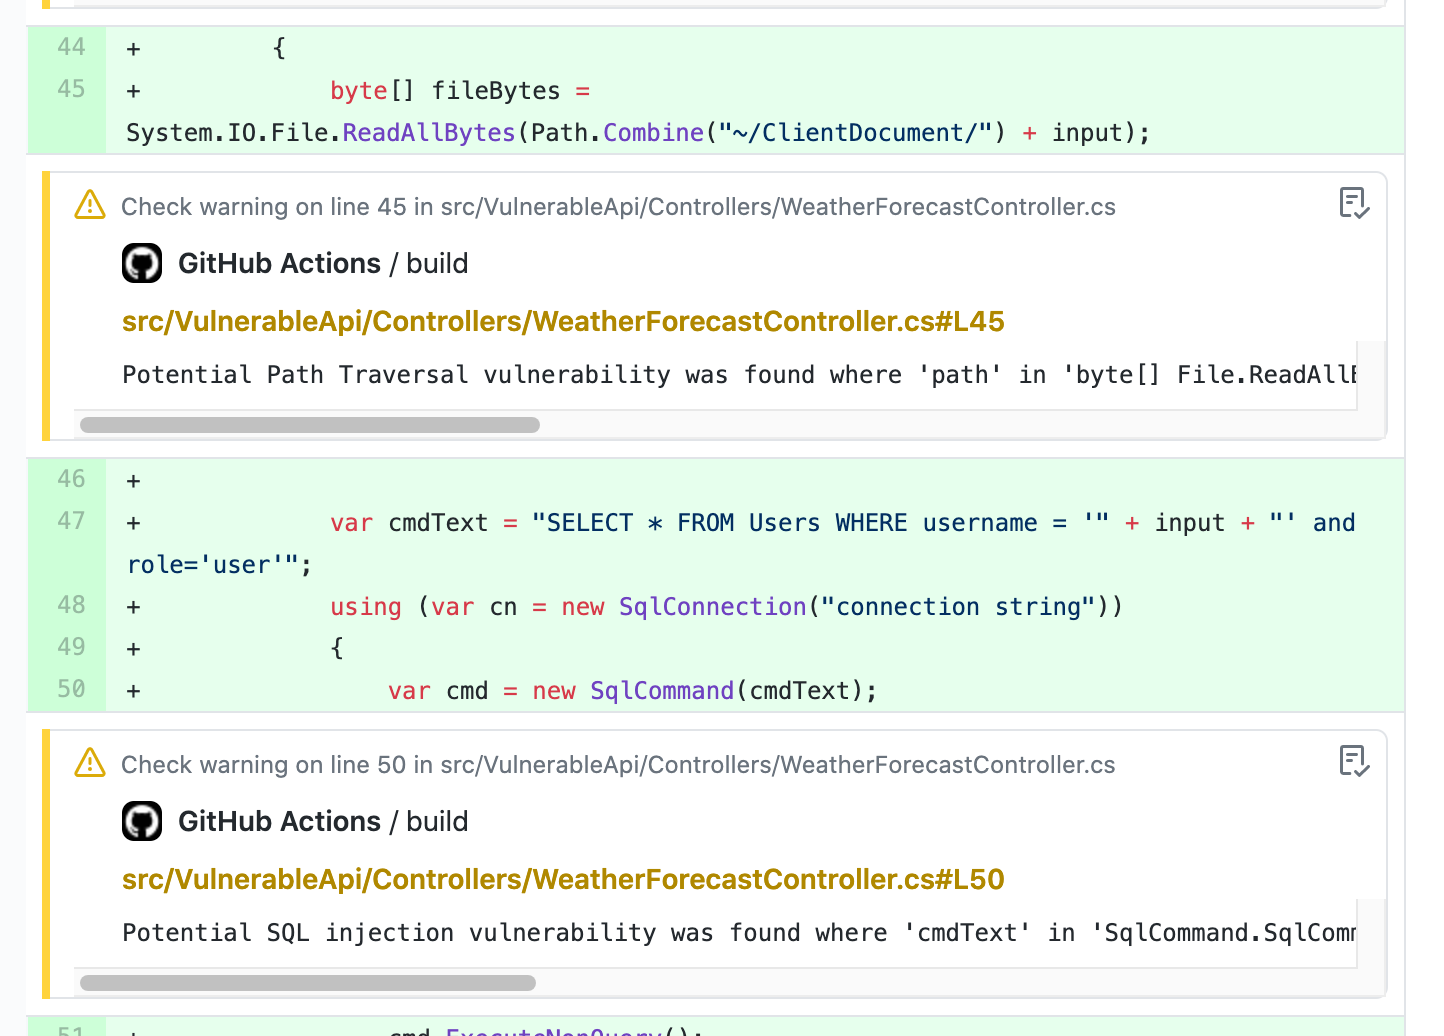
I’ll likely dig into these tools in a later post but it’s worth noting that in my tests only SCS and Sonar detected a number of OWASP vulnerabilities. The nice thing about running SCS as part of your build with GitHub actions is that any warnings surface as comments on the PR:
If your repository includes multiple projects you can drop a Directory.Build.Props file in the src directory to ensure all projects have SCS installed by default:
<Project>
    <Import Project="$([MSBuild]::GetPathOfFileAbove('Directory.Build.props', '$(MSBuildThisFileDirectory)../'))" />
    <ItemGroup>
        <PackageReference Include="SecurityCodeScan.VS2019" Version="5.0.0" PrivateAssets="all" />
    </ItemGroup>
</Project>
Note that the Import statement is needed to inherit the properties of the root Directory.Build.props file.
Build Automation
To orchestrate building, testing and deploying my projects I’m using the Cake build tool. I’m a big fan of being able to run by builds locally, especially when building complex workflows as it’s far easier to test build scripts on your machine than a CI server.
Cake has majority of build tools supported (either directly or through add-ins) and can call out to any executable or .NET tool.
I’ve found that the following build tasks are enough for most projects:
- Default - Builds the project, runs tests, creates packages (locally) and generates coverage reports
- CI - Kicks off the Sonar scanner, runs the default build and uploads coverage to Sonar and Coveralls
- Publish - Runs the CI build for merges into main/tagged commits, publishing release packages to nuget.org and pre-release packages to GitHub Packages.
To run a specific task you can pass the target argument to the cake bootstrapper:
./build.sh --target CI
One of my favourite features of Cake is the ability to load Cake scripts from a NuGet package. This is perfect for sharing standard build scripts within your organisation, for example:
#load nuget:?package=utilities.cake&include=/**/NoFoo.cake
CI
The nice thing about using a tool like Cake is that pretty much any CI server that can run an executable will work. I prefer CI systems that are driven by configuration files that live in your repository and have had success with Travis, AppVeyor, CircleCI and GitHub Actions.
These days I mostly stick with GitHub Actions as it’s tightly integrated with GitHub and the workflows are simple to setup (especially when using Cake):
name: Build

on:
  pull_request:
    branches: [main]

jobs:
  build:
    runs-on: ubuntu-latest

    steps:
      - uses: actions/checkout@v2
        with:
          fetch-depth: 0 # Required for MinVer
      - name: Setup .NET
        uses: actions/setup-dotnet@v1
        with:
          dotnet-version: 5.0.x
      - name: Restore tools
        run: dotnet tool restore
      - name: Run the build script
        uses: cake-build/cake-action@v1
        env:
          COVERALLS_TOKEN: ${{ secrets.COVERALLS_TOKEN }}
          SONAR_TOKEN: ${{ secrets.SONAR_TOKEN }}
          GITHUB_TOKEN: ${{ secrets.GITHUB_TOKEN }}
        with:
          target: CI
One area that Cake could improve in is providing a standard interface to expose CI environment data. This would have enabled my build script to be CI server agnostic whereas currently I need to call out to specific CI add-ins to get the Git/PR details needed for Coveralls. There’s a good example of this in the Cake Recipe project so it’s certainly possible to achieve this yourself. After all, it’s just C#.
Docs
We’ve all been there; a library that promises the world only to offer no guidance on how to use it. Every GitHub repo should have at minimum a README that explains how to install the library, how to get started and how to contribute. It should also include licensing information as this may impact the use of the library in a commercial setting. You can create your own linkable license at https://github.com/remy/mit-license. Who doesn’t love a badge?!
One downside of hand-rolled documentation is that it can become out of date as the code changes. The ideal solution would be to generate docs from your code that can then be enriched with additional content. [DocFx], a documentation tool from Microsoft, does exactly this and already drives the official .NET API documentation.
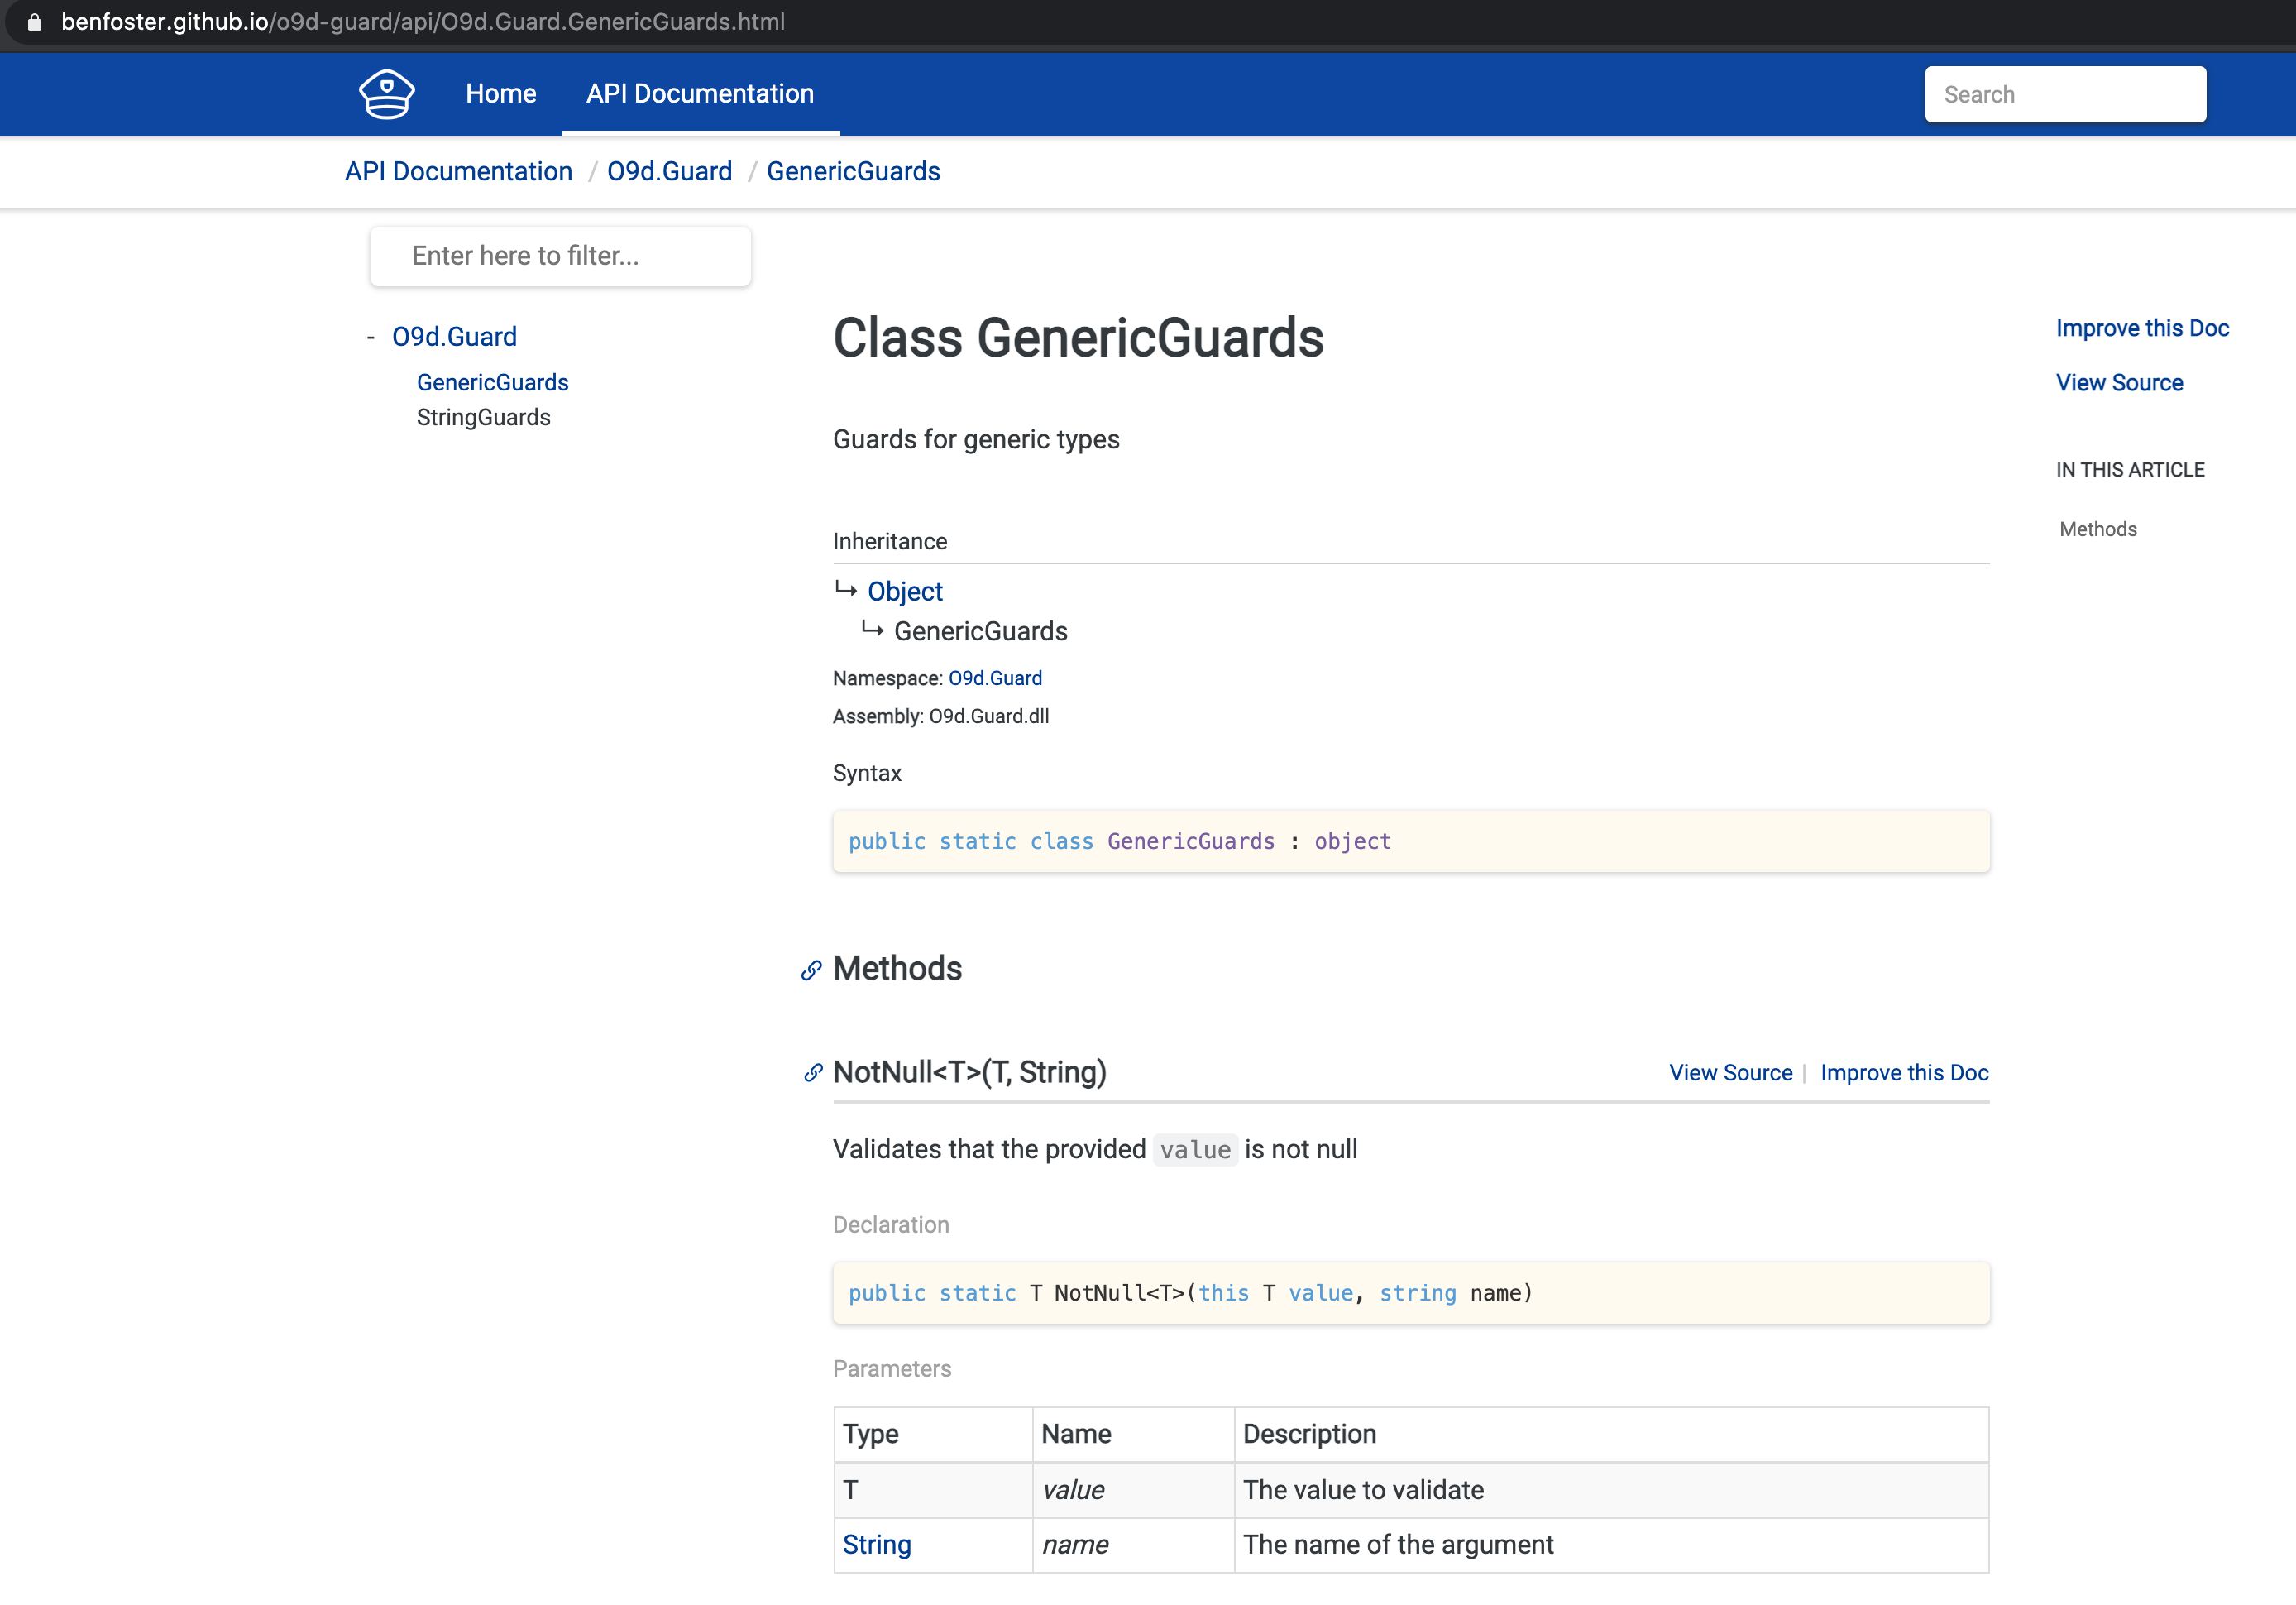
DocFx can be combined with GitHub Pages so that you can host your documentation site through GitHub. For example, you can check out the Guard docs at https://benfoster.github.io/o9d-guard/:
To publish the docs I’m making use of the Cake Git Add-in. When merging into the main branch I trigger the following workflow, which:
- Gets the current commit details (the one triggering the build)
- Clones the
gh-pagesbranch into a temporary directory - Syncs the compiled docs into the above directory using Kudu Sync
- Checks for changes
- Publishes the changes to the
gh-pagesreferencing the source commit
You can see the corresponding commits here.
Conclusion
This post covered a number of tools and practices you can use to create libraries that are well tested, documented and secure. I’ll continue to use Guard as my playground so you may want to keep this post bookmarked as I’ll be adding to it over time.
Special thanks
A big thanks to Gary Ewan Park and Mattias Karlsson for putting up with all my Cake questions on Twitter.